

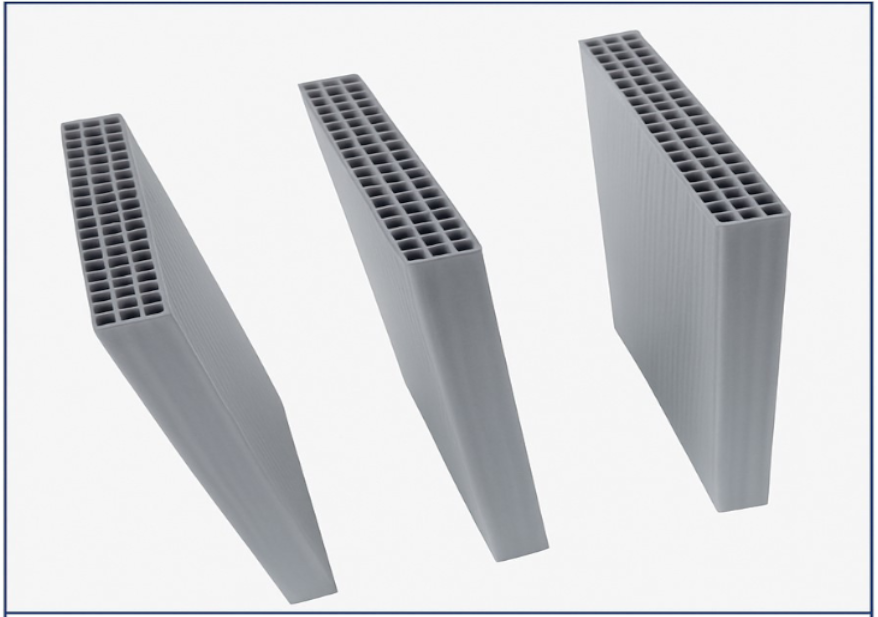
Specifying the right spacer panel is critical to duct bank success. It influences installation time, structural integrity, thermal regulation, and long-term serviceability. This guide breaks down how to approach choosing the right spacer panel for duct banks, from material and size to layout and code compliance.
Why Spacer Panels Matter in Duct Bank Construction
The Role of Spacer Panels in Underground Infrastructure
Spacer panels maintain the geometry of conduit banks, ensuring proper spacing, alignment, and separation between pipes during concrete encasement. They serve both structural and operational roles, guiding cable pathways and reducing future excavation needs.
Performance and Safety Implications
Improper spacing can lead to:
- Overheating in power ducts
- Electromagnetic interference in telecom lines
- Increased cable friction during pulls
- Code non-compliance that may require rework
Choosing the correct panel prevents these issues and extends system life.
Key Factors When Selecting a Spacer Panel
Pipe Diameter and Spacing Needs
Different conduit sizes require different hole diameters and clearances. Consider:
- Standard conduit sizes (1″ to 6″)
- Spacing required for airflow and heat dissipation
- Clearance from trench walls and other utilities
Always match panel hole diameters to conduit outer diameter (OD) and allow for expansion/contraction.
Material Type (Polypropylene vs. Other Plastics)
Fluted polypropylene is the preferred choice due to:
- High strength-to-weight ratio
- CNC machinability
- Chemical and water resistance
Alternatives include HDPE (more flexible, but lower form stability) and PVC sheets (less CNC friendly).
Panel Thickness and Load-Bearing Capacity
Panel thickness affects durability. Standard options:
- 4mm: Lightweight jobs
- 6mm: General utility work
- 8mm+: High-load or multi-tier conduit layouts
Thicker panels withstand trench wall pressure and ensure alignment during concrete pour.
Additional Note: For heavy industrial applications or where shifting soils are a concern, 10mm+ reinforced polypropylene panels offer the highest level of protection and alignment stability.
Understanding Layout Configurations
Horizontal vs. Vertical Stacking
Depending on trench width and conduit quantity:
- Horizontal layouts minimize depth and are easier to service
- Vertical stacking optimizes narrow trenches but requires stronger spacers
Mixed stacking is also common in high-density duct banks.
Complex Conduit Patterns
Larger installations (data centers, substation corridors) may require custom patterns with variable conduit sizes, spacing, and entry/exit directions.
Use CAD models to plan these configurations precisely.
Custom vs. Standard Layouts
- Standard panels are cost-effective for common configurations (3×3, 4×2)
- Custom CNC panels optimize installation efficiency on larger or uniquely shaped layouts
When considering custom configurations, ensure all conduits maintain code-specified separation distances and that panels allow for staggered routing where necessary.
Compatibility with Regulatory Standards
NEC, ANSI, and Local Code Requirements
Spacer panels must support:
- NEC Article 300.5 burial depths
- Proper spacing for thermal derating (NEC Table 310.15)
- Flame and fire separation codes (UL-94 ratings)
Always confirm spacer panel specs with engineering drawings and AHJ (Authority Having Jurisdiction) standards.
Additional Tip: Engage early with your electrical engineer of record to confirm conduit grouping, bonding, and separation compliance—especially in mixed-use (power + telecom) duct banks.
Environmental and Climate Considerations
Soil Conditions and Moisture Resistance
Spacer panels used in:
- Wet or sandy soil: Require chemical and water resistance (polypropylene preferred)
- Rocky areas: Thicker panels reduce cracking risk
In regions with fluctuating groundwater tables, pair panels with geotextile fabric and gravel bedding for added trench stability.
Extreme Temperature Compatibility
In cold regions (e.g., Midwest winters) or hot climates (e.g., Arizona), material expansion and brittleness are concerns. Polypropylene has excellent thermal resistance in -20°F to 200°F range.
Also consider thermal loading from adjacent power conduits when selecting panel thickness and material to prevent warping or softening over time.
Installation Efficiency and Labor Costs
How Spacer Layout Affects Install Time
Well-designed spacer panels:
- Reduce on-site measuring
- Speed conduit alignment
- Decrease need for rework after concrete pour
CNC panels with pre-drilled holes save hours per segment, especially in projects over 500 linear feet.
Using pre-labeled panels with conduit IDs can reduce install time by 20–30% and help with documentation and as-built validation.
Case Example: Layout Optimization Saves 2 Days
On a recent commercial utility project in North Carolina:
- Engineers switched from on-site wood spacers to CNC polypropylene panels
- The team saved 16 labor hours across four duct runs
- No post-pour realignment was required
Result: Faster project completion and $2,300 in labor savings.
In another example, a renewable energy microgrid in Colorado used pre-cut 4×4 panel sets for over 1,000 feet of duct bank and finished installation 3 days ahead of schedule.
Common Buyer Mistakes to Avoid
- Choosing incorrect panel thickness for soil conditions
- Ignoring code-required conduit separation distances
- Using mismatched panel hole sizes
- Overlooking trench width and depth constraints
- Ordering panels without validating total conduit run length and stacking height
Avoiding these errors prevents downtime, rework, and failed inspections.
Where to Get Help with Spacer Panel Selection
Consulting with Manufacturers
Most spacer panel suppliers offer:
- Layout templates
- Conduit spacing calculators
- Custom CNC panel fabrication
Engage them early in design to streamline approvals.
Some advanced manufacturers offer 3D preview models, tolerance verifications, and mockup kits for submittal to project stakeholders.
Using Duct Bank CAD Tools
Use software like:
- AutoCAD Civil 3D (with MEP plugins)
- Revit MEP
- Bluebeam (for as-built overlay)
These tools help visualize spacer layout and detect conflicts before build.
Pair CAD outputs with augmented reality (AR) viewers or field tablets for real-time trench layout assistance.
Conclusion
Choosing the right spacer panel for duct banks involves more than picking a plastic sheet. It requires evaluating pipe sizes, soil conditions, layout complexity, and code compliance. Engineers and specifiers who approach this decision carefully will benefit from smoother installations, better cable performance, and lower total cost of ownership.
Use this guide alongside manufacturer specs and duct bank design tools to confidently select the right panel for any underground infrastructure project.
When in doubt, consult with engineering support teams, use real-world mockups, and document all design assumptions to future-proof your build.


